ARCHITECTURAL VISUALISER | TEXTURE ARTIST & 3D MODELLER for
BLACK MESA - A HL2 MODIFICATION | SOFTIMAGE , OCTANE RENDER, SHIVA 3D, REAPER.FM & SKETCHUP USER | HALFLIFE2 & ARMA2 MODDER | CMIVFX AFFILIATE | ANDROID / MOBILE DEVELOPER
23 November 2010
GEAR - opensource rigging system for Softimage
GEAR - Quick overview from Jeremie Passerin on Vimeo.
It includes a modular rigging system to easily create rigs for any kind of character in Autodesk Softimage.
This first video shows a basic overview of the system. Three videos can be viewed on the Vimeo GEAR channel.
Expect an initial release any day now.

Softimage > gile[s] lightmapper> ShiVa3d tutorial
This is a basic tutorial on how to use gile[s] lightmapper with Shiva3d (as much for me as for anyone else).

Lightmaps are useful for getting static lighting onto scenery on low-end Android phones as some do not support per-pixel lighting and also suffer from artifacts when using ShiVa3d per-vertex lighting.
Anyway, this tutorial takes us through a very quick generation of a lightmap in gile[s] v2 (Version 2 is still in beta and will probably remain that way, however v1 seems to have issues in Windows 7 and lacks some v2's feature set):-
Tutorial
1. Build the model in Softimage and export as an obj with the UVs for the diffuse maps already done. Import into giles[s].
2. In gile[s], add a sky, by clicking on the create sky button under the create tab. Click somewhere near your imported model.

3. Pan the scene by see the sky, then select the sky under the model tab and tweak the settings so that the sky is high and bright in the sky (see image).

4. Low-end Android phones (like HTC Hero) can't handle any textures above 256x256 very well, performance is hit quite a bit. In the Top menu > Editors > Lighting Methods editor; click on the add button at the bottom of the Lighting methods dialogue (icon with a green plus sign) to add a new Lightmap. If you want crisper shadows you will need to add a directional light to the scene also. I'm just going for a daylight ambience in this tutorial.


7. Lastly, choose the GI renderer, you have options of Path Tracer, GPU Radiosity or Ambient Occlusion:-

8. From here on, tweak settings in all the various dialogs mentioned and re-render as you go, until you are satisfied with the results.
9. Export should be done using *.obj (I've tried others but obj seems the most problem-free). Export will create 3 files: the original mesh, a 2nd mesh with the lightmap UV generated by gile[s] and the lightmap itself in bmp format. Bring all files back into Softimage (or your chosen 3d DCC app) and create a second UV set on the original mesh (property > Texture > Planar UV). Using the texture editor (F7), copy and paste the lightmap UV set from the lightmap UV mesh onto the second UV set of the original mesh. Finally, export the mesh as a DAE file. Import into ShiVa.
10. For the mesh's material, change the Material>Texturing effect to "Modulate", put the lightmap into Effect Map 1 and the Diffuse/Color map into Effect Map 0. Under the lighting tab set Emissive to black, Ambient and Diffuse to White.
Easy.

Lightmaps are useful for getting static lighting onto scenery on low-end Android phones as some do not support per-pixel lighting and also suffer from artifacts when using ShiVa3d per-vertex lighting.
Anyway, this tutorial takes us through a very quick generation of a lightmap in gile[s] v2 (Version 2 is still in beta and will probably remain that way, however v1 seems to have issues in Windows 7 and lacks some v2's feature set):-
Tutorial
1. Build the model in Softimage and export as an obj with the UVs for the diffuse maps already done. Import into giles[s].
2. In gile[s], add a sky, by clicking on the create sky button under the create tab. Click somewhere near your imported model.

3. Pan the scene by see the sky, then select the sky under the model tab and tweak the settings so that the sky is high and bright in the sky (see image).

4. Low-end Android phones (like HTC Hero) can't handle any textures above 256x256 very well, performance is hit quite a bit. In the Top menu > Editors > Lighting Methods editor; click on the add button at the bottom of the Lighting methods dialogue (icon with a green plus sign) to add a new Lightmap. If you want crisper shadows you will need to add a directional light to the scene also. I'm just going for a daylight ambience in this tutorial.

5. Again, from the editors menu, select Material Editor to call up the materials editor. Select the lightmap you just created under the Lighting Method area of the dialog.

6. In the Light Methods Editor you'll notice the material you added the new Lightmap to has now been placed under the light map in the tree on the left had side. This means that multiple materials can use the same lightmap or each material can have its own lightmap. It's all about finding the right compromise between performance and aesthetic quality.

9. Export should be done using *.obj (I've tried others but obj seems the most problem-free). Export will create 3 files: the original mesh, a 2nd mesh with the lightmap UV generated by gile[s] and the lightmap itself in bmp format. Bring all files back into Softimage (or your chosen 3d DCC app) and create a second UV set on the original mesh (property > Texture > Planar UV). Using the texture editor (F7), copy and paste the lightmap UV set from the lightmap UV mesh onto the second UV set of the original mesh. Finally, export the mesh as a DAE file. Import into ShiVa.
10. For the mesh's material, change the Material>Texturing effect to "Modulate", put the lightmap into Effect Map 1 and the Diffuse/Color map into Effect Map 0. Under the lighting tab set Emissive to black, Ambient and Diffuse to White.
Easy.
18 November 2010
ShiVa3D Game Wins $50,000

Crusade Of Destiny, the game developed for HP webOS by Jopacus J Parrott of dVideArts, has won $50,000 in the HP Palm PDK Hot Apps Promotion.
The game was released for HP webOS in 2010 and also Android and iPhone platforms. It became a top three app on all platforms shortly after release and was at number one in the webOS Hot Apps charts over summer 2010.
Congratulations Jopacus.
EDIT: A case study for Crusade of Destiny has now been posted on the Shiva blog here.
EDIT: A case study for Crusade of Destiny has now been posted on the Shiva blog here.
02 November 2010
ShiVa 1.9 released
Stonetrip is running two webinars on Wednesday 3rd Nov 2010 to introduce and inform newcomers and current users about the release of Shiva 1.9. Click here for information about these webinars.

ShiVa v1.9 (by Stonetrip) is due to be released this week (as far as I can tell). ShiVa3D is a 3d development platform taylored towards anyone wanting to create 3D real-time applications and games for Web, Windows, Mac OS, Linux, iPhone, Android, Palm, Wii and the iPad. ShiVa is a powerful multiplatform 3D game engine, WYSIWYG 3D Editor and MMO Server.
In regards to using Softimage with it: Shiva imports DAE files but animated files exported directly from Softimage can be problematic. Shiva's importer purges duplicate keyframes and Softimage's export has no straight way of tweaking data (randomising keyframes) so that third party apps do don't do this.
I discovered this when I did some tests here:
http://www.stonetrip.com/developer/forum/viewtopic.php?f=12&t=20690
Export options for Collada 5.1:

Several apps can process Softimage-exported DAE files correctly. Ultimate Unwrap 3d is one of them.
It is probably the closest competitor to Unity3d which also offers a single editor/GUI for creating games and 3d applications for multiple platforms including the Web.
For the indie user, however, ShiVa's main advantage over Unity is that it enables you to develop for all aforementioned platforms for at a very reasonable price. Unity still charges individual prices for each platform.
In regards to using Softimage with it: Shiva imports DAE files but animated files exported directly from Softimage can be problematic. Shiva's importer purges duplicate keyframes and Softimage's export has no straight way of tweaking data (randomising keyframes) so that third party apps do don't do this.
I discovered this when I did some tests here:
http://www.stonetrip.com/developer/forum/viewtopic.php?f=12&t=20690
Export options for Collada 5.1:

Several apps can process Softimage-exported DAE files correctly. Ultimate Unwrap 3d is one of them.
13 October 2010
ViewCube fun!


It seems that the viewcube is going down with the Softimage community better than expected! Apparently, you can even re skin it. Borg is courtesy of Rob Wuijster. Weighted companion cube by
Gerbrand Nel, I believe (please comment if this is incorrect.)
08 October 2010
07 October 2010
nDo - normal map creation without leaving Photoshop


Teddy Bergsman has posted a tutorial at Philip Klevestav's website about how to use a Photoshop plugin called nDo here.
Information and download link for nDo can be found here.
Why does it stand out amongst the numerous normal map creation softwares? It allow creations of normal maps in Photoshop. This approach could be a game changer for normal map workflow. I still can't believe photoshop can't do this natively...
Craft Rig by Tiago Beijoco

I think I missed this one when Tiago Beijoco posted about it on Si-community (in January). It's a very sweet, customizable rig. It works similarly to the Auto-Rig built into Softimage but sports extra features like stretchy limbs and spine. You choose the numbers of elements required for each part of the rig and then a script builds it for you.
You can download directly from here or check out his website for a video about it.
27 September 2010
Exocortex Technologies releases trial version of Slipstream VX for Softimage 2010/2011
Fast Smoke and Fire Simulation (SlipstreamVX by Exocortex) from Exocortex Technologies, Inc. on Vimeo.
Thiago has been a busy little bee!
Fluid simulation specialists Exocortex Technologies, in collaboration with Thiago Costa of Lagoa Technologies, today announces the public release of the innovative "SlipstreamVX" smoke, air and fire simulator for Autodesk Softimage 2010 and 2011. SlipstreamVX introduces a new method of simulating fluids to the VFX artist community. Rather than employing a voxel simulation method that uniformly divides up space whether or not anything interesting is happening, the patent pending SlipstreamVX focuses on the interesting aspects of the fluid, the turbulence, wherever it is and it represents in explicitly.
This innovative approach to fluid simulation gives SlipstreamVX two unique and powerful benefits:
First, SlipstreamVX does not limit its fluid simulations to any type of bounding box. Fluid simulations are free to go where they want. You can have detail where you want it. You can have multiple centers of details and interaction between originally disparate areas of interest with ease. SlipstreamVX efficient representation of turbulence means that you don't run out of memory.
Second, SlipstreamVX can simulate the complex and detailed fluid dynamics of smoke and fire in real-time and near-real-time. Voxels are not only memory consuming but they are slow. SlipstreamVX explicit turbulence representation is simply much more efficient. Having a real-time simulation makes it easier for an artist to refine a simulation's look and feel.
As demonstrated on the exhibit floor of SIGGRAPH 2010, SlipstreamVX is fully multithreaded to take advantage of Intel's Xeon and Core i7 CPUs. SlipstreamVX along with Intel's technology increases the speed of simulation creation and iteration beyond artists current expectations.
Lastly, SlipstreamVX is being distributed with Exocortex's new GPU-accelerated "Fury" renderer. Fury was designed to compliment SlipstreamVX's near-real-time simulation with real-time rendering of simulation-centric atmospheric effects. The rapidly evolving Fury renderer already supports depth of field, motion blur, a density integrator and matte objects.
The SlipstreamVX simulation and Fury renderer bundle along with support for the first year is available now for $399.99 CND. A time limited trial version of SlipstreamVX and Fury is available from the Exocortex website:
http://www.exocortex.com/simulation/slipstreamvx
Fast Shot Setup and Turnaround
Nothing in the market compares with SlipstreamVX's speed. When you create a simulation scenario and press play for the first time, the SlipstreamVX simulation often plays back at better than real-time speeds, even with detailed simulations.
Deep Softimage ICE Integration
Exocortex co-developed SlipstreamVX with famed Softimage TD Thiago Costa. As a result, SlipstreamVX is designed from the start as an ICE-based simulator that both leverages the power and the flexibility inherent in ICE. SlipstreamVX isn't just a black box simulator that has been made into an ICE node.
Simulation Boxes are Obsolete
SlipstreamVX brings to VFX artists a fundamentally new method of fluid simulation, a method that no longer requires the otherwise ubiquitous and limiting "simulation box." SlipstreamVX simulations can be anywhere in your scene and go anywhere. You can now focus on achieving the simulation behavior rather than how you should place and update your "simulation box."
GPU-Accelerated Rendering
We understand that a great simulator is nothing if you can't easily render the results. We decided to go further than just providing a render, we made a lightning fast GPU-accelerated renderer so that you can render your simulation results as fast as SlipstreamVX can simulate them. Our new renderer, Fury, can render luminous simulation as well as do near instantaneous density integration. Hassle-free self-shadowing is on the way.
First Class Product Support
We believe in our products and want to help you make the most of them. In service of that goal, we have made available video tutorials, quality documentation, a user discussion mailing list as well as rapid response email-based support.
If you are having problems trying to create a particular scenario, give us a shout as we can likely help you attain your goals.
This technology is patent pending.
20 September 2010
studioNEST Momentum + Kratos
studioNEST Momentum + Kratos Final from helge mathee on Vimeo.
Excellent toolset for rigid body dynamics and shattering coming sometime this week.
Keep an eyeout for it here: http://www.studionestbarcelona.com/opensource/
10 September 2010
Softimage 2011.5
2011.5 (subscription advantage pack) features lots of nice improvements including:
Lagoa Materials Multiphysics Simulation Framework
• ICE for artists — a new ICE module menu toolbar facilitates building common ICE effects: particles, deforms and kinematics. Using the menu structure, artists can see nodes and compounds connect automatically in the ICE Tree, and create or modify Lagoa Multiphysics materials and other preset effects.
• Stereoscopic 3D support — new stereo camera rigs for stereoscopic productions and in-viewport stereoscopic viewing of 3D scenes
• Softimage Composite — a high-performance, high dynamic range (HDR) compositor with support for stereoscopic production pipelines; Autodesk Softimage Composite will include advanced keying, color correction, tracking and 3D compositing tools and will be compatible with Autodesk Maya 2011 Composite and Autodesk 3ds Max 2011 Composite.
• Polygonizer operator — will help create smoother polygon meshes for liquids
• Maya nCache — Maya nCache format reading and writing will be supported in Softimage
• Autodesk MatchMover toolset— a high-quality professional camera tracker
• Other enhancements: new shader compounds, ray traced shadows for infinite lights, improved OpenGL sprites, the ViewCube functionality and two new real-time shader wizards
Demonstration videos:
http://www.the-area.com/blogs/marks/introducing_softimage_2011_5_with_lagoa
Expected to ship on or after September 29, 2010.
Lagoa Materials Multiphysics Simulation Framework
• ICE for artists — a new ICE module menu toolbar facilitates building common ICE effects: particles, deforms and kinematics. Using the menu structure, artists can see nodes and compounds connect automatically in the ICE Tree, and create or modify Lagoa Multiphysics materials and other preset effects.
• Stereoscopic 3D support — new stereo camera rigs for stereoscopic productions and in-viewport stereoscopic viewing of 3D scenes
• Softimage Composite — a high-performance, high dynamic range (HDR) compositor with support for stereoscopic production pipelines; Autodesk Softimage Composite will include advanced keying, color correction, tracking and 3D compositing tools and will be compatible with Autodesk Maya 2011 Composite and Autodesk 3ds Max 2011 Composite.
• Polygonizer operator — will help create smoother polygon meshes for liquids
• Maya nCache — Maya nCache format reading and writing will be supported in Softimage
• Autodesk MatchMover toolset— a high-quality professional camera tracker
• Other enhancements: new shader compounds, ray traced shadows for infinite lights, improved OpenGL sprites, the ViewCube functionality and two new real-time shader wizards
Demonstration videos:
http://www.the-area.com/blogs/marks/introducing_softimage_2011_5_with_lagoa
Expected to ship on or after September 29, 2010.
09 September 2010
Electron Microscope Shader Compound
Electron Microscope Shader Compound for Autodesk Softimage from François Gastaldo on Vimeo.
Nice little compound shader released recently by François Gastaldo.
Download from here.
07 September 2010
ICE Walking system
ICE Walking System from LAVISH on Vimeo.
The walking system itself is demonstrated about 12 minutes into the video (I recommend viewing in HD). An extremely impressive work of modelling and rigging. This is precisely the sort of work Softimage needs to showcase its ICE rigging abilities (implemented in 2011). Considering Softimage 3d had a procedural walking system built into it in 1998, I think it's about time XSI was shipped with multiple rigs of many different types (an auto rig building system which could cover about 90% of all rigging requirements if done well) and multiple (production ready) ICE-based procedural walking systems, out of the box. These could be installed as a workgroup users could plunder and explore.
05 September 2010
SketchUp 8 released
Kind of drifted beneath my radar this one! Very busy last week. Will be pushing my office to upgrade to v8 next week.
#
What it also highlighted for me was a new online application for Google Earth called BuildingMaker which SketchUp8 allows you to import models directly from allowing you to place new buildings into context.
#
What it also highlighted for me was a new online application for Google Earth called BuildingMaker which SketchUp8 allows you to import models directly from allowing you to place new buildings into context.
01 September 2010
No Pets Allowed (possible upcoming sixbirds/studioNEST feature)
NO PETS ALLOWED (Animation feature film) from Josep Pozo on Vimeo.
NO PETS is the second animation feature film in development at SIX BIRDS. CGI process was
done in our daughter company StudioNEST.
It's 100% Softimage + Arnold render + StudioNest (Brigks + Melena)
29 August 2010
studioNEST snShatter tool - coming soon
studioNEST Shatter Early Preview from helge mathee on Vimeo.
To quote the original page: "This is a quick demo of the fracturing operator from studioNEST, called snShatter. The implementation of this operator for Autodesk Softimage will be released as opensource, like the other tools from studioNEST."
UPDATE:
studioNEST Bullet Early Preview from helge mathee on Vimeo.
26 August 2010
Making Metagun
Just came across this little gem - Making Metagun. Showing the development of a whole game in 7mins of time-lapse video.
It's not the only video of this type. There's several of note using Unity too:
24 August 2010
Softimage 2011 SAP to include both Lagoa Multiphysics & emPolygonizer
It's official.
The Softimage 2011 Subscription Advantage Pack will include both Lagoa Multiphysics and emPolygonizer 1.721. Nice!
Source: http://twitter.com/luceric/statuses/21944883703
Let's hope all the SI2011 bugs/usage issues have all been squashed too.
The Softimage 2011 Subscription Advantage Pack will include both Lagoa Multiphysics and emPolygonizer 1.721. Nice!
Source: http://twitter.com/luceric/statuses/21944883703
Let's hope all the SI2011 bugs/usage issues have all been squashed too.
20 August 2010
MATERIALS Tutorials by Philip Klevestav
Posted up on Game Artists recently is a fantastic set of tutorials on how to create specific materials for Game art.
http://www.philipk.net/tutorials/materials/materials.html


This tutorial will guide you through the creation of a rough stone surface, this could be combined with something more similar to the cliff wall tutorial above to create various types of rock surfaces.
Cracked stones can look very different depending on what materials is underneath the surface, what type of damage has been done and how long ago the damage was made. Here I go through some steps to create a broken up ground piece. Ingame something like this could be masked out and used as a decal as well.

Clean concrete blocks are usually pretty smooth, but there are details and small subtle variations is such surfaces that you can really play around with. In this tutorial I go through some steps you can do using Photoshop only.

Sometimes it is not really necessary to sculpt your stones. Especially when it comes to smaller brick walls. In this tutorial I go through some steps to give your brick wall more depth than a simple photo texture would work if generated into a normal map.
EDIT: Previous tutorials by PhilipK, excellent stuff!:
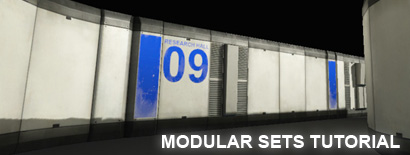
PHILIPK.NET - WORKING WITH MODULAR SETS
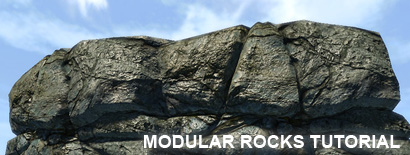
PHILIPK.NET - WORKING WITH MODULAR ROCKS
http://www.philipk.net/tutorials/materials/materials.html
METAL
As with all materials, there are a lot of different types of metal. In this tutorial I go through howto create a pretty standard matte metal wall with a sci-fi touch and I tried to make it something inbetween clean and worn.ROUGH AND COARSE STONE
Stone cliffs and rocks usually have a lot of direction of some type in them. In this tutorial I go through how I go about sculpting such a material in Zbrush and the process from there.This tutorial will guide you through the creation of a rough stone surface, this could be combined with something more similar to the cliff wall tutorial above to create various types of rock surfaces.
Cracked stones can look very different depending on what materials is underneath the surface, what type of damage has been done and how long ago the damage was made. Here I go through some steps to create a broken up ground piece. Ingame something like this could be masked out and used as a decal as well.
SMOOTH AND SEMI SMOOTH STONE
Marble can be another tricky surface to create. Here I created a clean polished marble surface that is highly reflective. It is all about subtle details on these kind of clean materials, especially when it comes to the normal map.Clean concrete blocks are usually pretty smooth, but there are details and small subtle variations is such surfaces that you can really play around with. In this tutorial I go through some steps you can do using Photoshop only.
BRICKS AND BLOCKS
Older or larger tiles may benefit from being sculpted in a program like Zbrush first. Here I go through some steps to sculpt such pieces and how much you can build with just a couple of sculpted stones if placed right.Sometimes it is not really necessary to sculpt your stones. Especially when it comes to smaller brick walls. In this tutorial I go through some steps to give your brick wall more depth than a simple photo texture would work if generated into a normal map.
EDIT: Previous tutorials by PhilipK, excellent stuff!:
PHILIPK.NET - WORKING WITH MODULAR SETS
PHILIPK.NET - WORKING WITH MODULAR ROCKS
19 August 2010
emPolygoniser 2.0 released
emPolygonizer2 Official Release Video "go ahead, mesh my day!" from Eric Mootz on Vimeo.
emPolygonizer2 Sneak Preview 1: Tim Borgmann's Test Renderings from Eric Mootz on Vimeo.
emPolygonizer2 Sneak Preview 2: Tim Borgmann's Test Renderings from Eric Mootz on Vimeo.
emPolygonizer2 is a custom operator that allows you to create what is typically called "metaballs".
The basic technique used by this plug-in is called "polygonising a scalar field" or "marching cubes". It was invented in the mid-eighties by Lorensen and Cline.
The plug-in consists of a "DLL" file (Windows) or "so" file (Linux) for the operator (compiled C++ code for 32 bit and 64 bit versions of XSI) as well as several VB Script files.
emPolygonizer2 is well integrated into Softimage|XSI and it is used just as easily as the other custom operators.
The operator supports the following objects and components as inputs:
nulls
curves and curve lists (points, knots or curve)
polygon meshes (points or polygons, parameters can be driven by weight maps and vertex color maps)
point clouds (points and strands, parameters can be driven by point size and point color)
emPolygonizer2 Sneak Preview 3: Tim Borgmann's Test Renderings from Eric Mootz on Vimeo.
Go here to the mootzoid product page to find out more
NOTE: Softimage 2011 and 2011.5 only. Includes Lagoa Physics support (coming in Softimage v2011.5).
Subscribe to:
Posts (Atom)