redmotion: realtime
Showing posts with label realtime. Show all posts

08 March 2011

Excortex presents Momentum 2.0


Momentum 2.0 Release Trailer from helge mathee on Vimeo.

Momentum goes commercial with version 2. Find more info about Exocortex and this product here.


Momentum 2.0 Example Scenes Overview from Exocortex on Vimeo.

At first it seems like just another physics plugin for Softimage, until you look at the feature comparison table:-

"Exocortex Momentum 2.0 is the most versatile multi-physics solver available for Softimage as demonstrated by the table below. But we know that this is often not enough, thus we have designed Momentum to integrate well with both Syflex as well as Lagoa."


Physics Solver Feature Comparison Table
 Momentum  PhysX  Lagoa  Syflex 
Rigid Bodies♦♦
Soft Bodies♦♦♦
Cloth♦♦♦
Ropes♦
Soft - Rigid Interaction♦
RBD Constraints♦♦
Softbody Constraints♦♦
Plasticity♦♦
Deforming RBDs♦
Build-In plotting♦
Collision Filtering♦♦
RBD Clustering♦


And all for $149 (individual license). I think that's very good value, especially when you consider that it even supports Softimage 2010 (which is something the original opensource Momentum from studioNest did not). If you're considering upgrading to 2012 mainly for the simulation features you just gained another option!

Well done and thanks to Helge Mathee and Exocortex!

01 March 2011

Softimage 2012

What's New in Softimage 2012

New features in Softimage 2012 include:
  • ICE Modeling: Create procedural geometry in the Interactive Creative Environment (ICE) based on a set of rules, conditions, and parameters. 
  • Enhanced Everyday Workflows: Enjoy greater overall productivity and ease of use, with across-the-board enhancements. The Texture Editor, Explorer, Schematic View, Scene Layer Manager, Render Tree, Bone Primitive, Reference Models, and Weight Editor have all received attention. 
  • Syflex on ICE: Use the power of ICE to achieve greater control and flexibility over Syflex cloth simulations. 
  • UV Unfolding: Save time and effort with new UV relaxing and pinning options. 
  • Lagoa Multiphysics: More easily achieve plastic, liquid, soft-body, cloth, and foam-like effects. 
  • Stereoscopic Support: Take advantage of the trend for 3D films with an in-viewport stereoscopic viewer offering a range of display modes and stereopscopic camera rig. 
  • Single-Step Suites Interoperability: More easily take advantage of the focused toolsets in the Autodesk® Entertainment Creation Suites Premium 2012, with new single-step interoperability between Softimage and Autodesk® Maya®, Autodesk® 3ds Max®, and Autodesk®Mudbox™ software. 
  • ICE FX Builder: Create and modify sophisticated effects more quickly and easily, with the help of the new ICE FX Builder. 
  • ICE Subframe Sampling: Calculate collisions more accurately in ICE simulations, with new support for subframe sampling on a per-object or per-point cloud basis. 
  • Vector Displacement Map Support: You can use mental ray® rendering technology to render complex high-resolution details created in Mudbox 2012 software or certain other applications on low-resolution geometry. 
  • New ICE Compounds, Preset FX, Shaders, and Model Library: More easily create a wide range of effects and rendered looks in ICE with the help of new compounds, shaders, and pre-defined ICE FX that can be used “as-is”, or customized as required. 
  • Maya nCache Support: More easily transport geometry and ICE simulations between Softimage and Maya 2012 software. 
  • Consistent F-Curve Editor: More easily switch between multiple products in the Autodesk Entertainment Creation Suites Premium thanks to an updated F-Curve Editor that provides a toolset that offers more consistent functionality and terminology for editing animation curves. 
  • Polygonizer: Build liquid and blobby effects with the new Polygonizer toolset. 
  • SDK Enhancements and Events: Facilities can now more easily customize and extend their tools and pipelines, with the exposure of more core Softimage services and events: Undo Bracketing, onCommand Events, and onRenderPass Events. 
  • Softimage Composite: Softimage® Composite toolset offers keying, tracking, color correction, raster and vector paint, rotoscoping, warping, advanced filters, a full 3D compositing environment, and tools that help support stereoscopic productions. 
  • MatchMover Professional Camera Tracking: Extract 3D camera and motion data from video and film sequences in order to insert CG elements into a live-action scene. 
  • FBX 2012: Through support for the Autodesk® FBX® 2012 asset exchange technology, artists can transfer stereo camera rigs, vector displacement maps, multiple UVs, and subframe samples for icecache and PC2 in and out of Softimage, making it easier to safely pass production assets between products. 
A set of new view videos can viewed now over at the Softimage blog.

16 February 2011

ShiVa3D-made "Convergence" on TI OMAP 4


Stonetrip's Shiva3D engine can create stereoscopic 3D games optimised for Texas Instruments OMAP 4 platform for mobile devices. This demo, first shown at Mobile World Congress, 14-17 February 2011, shows Convergence.

If you've any doubt about Omap4's performance check out the benchmarks recently posted by Anandtech.

23 November 2010

Softimage > gile[s] lightmapper> ShiVa3d tutorial

This is a basic tutorial on how to use gile[s] lightmapper with Shiva3d (as much for me as for anyone else).


Lightmaps are useful for getting static lighting onto scenery on low-end Android phones as some do not support per-pixel lighting and also suffer from artifacts when using ShiVa3d per-vertex lighting.

Anyway, this tutorial takes us through a very quick generation of a lightmap in gile[s] v2 (Version 2 is still in beta and will probably remain that way, however v1 seems to have issues in Windows 7 and lacks some v2's feature set):-

Tutorial


1. Build the model in Softimage and export as an obj with the UVs for the diffuse maps already done. Import into giles[s].


2. In gile[s], add a sky, by clicking on the create sky button under the create tab. Click somewhere near your imported model.


3. Pan the scene by see the sky, then select the sky under the model tab and tweak the settings so that the sky is high and bright in the sky (see image).


4. Low-end Android phones (like HTC Hero) can't handle any textures above 256x256 very well, performance is hit quite a bit. In the Top menu > Editors > Lighting Methods editor;  click on the add button at the bottom of the Lighting methods dialogue (icon with a green plus sign) to add a new Lightmap. If you want crisper shadows you will need to add a directional light to the scene also. I'm just going for a daylight ambience in this tutorial.

5. Again, from the editors menu, select Material Editor to call up the materials editor. Select the lightmap you just created under the Lighting Method area of the dialog.

6. In the Light Methods Editor you'll notice the material you added the new Lightmap to has now been placed under the light map in the tree on the left had side. This means that multiple materials can use the same lightmap or each material can have its own lightmap. It's all about finding the right compromise between performance and aesthetic quality.

7. Lastly, choose the GI renderer, you have options of Path Tracer, GPU Radiosity or Ambient Occlusion:-

8. From here on, tweak settings in all the various dialogs mentioned and re-render as you go, until you are satisfied with the results. 


9. Export should be done using *.obj (I've tried others but obj seems the most problem-free). Export will create 3 files: the original mesh, a 2nd mesh with the lightmap UV generated by gile[s] and the lightmap itself in bmp format. Bring all files back into Softimage (or your chosen 3d DCC app) and create a second UV set on the original mesh (property > Texture > Planar UV). Using the texture editor (F7), copy and paste the lightmap UV set from the lightmap UV mesh onto the second UV set of the original mesh. Finally, export the mesh as a DAE file. Import into ShiVa.


10. For the mesh's material, change the Material>Texturing effect to "Modulate", put the lightmap into Effect Map 1 and the Diffuse/Color map into Effect Map 0. Under the lighting tab set Emissive to black, Ambient and Diffuse to White.


Easy.
02 November 2010

ShiVa 1.9 released

Stonetrip is running two webinars on Wednesday 3rd Nov 2010 to introduce and inform newcomers and current users about the release of Shiva 1.9. Click here for information about these webinars.


ShiVa v1.9 (by Stonetrip) is due to be released this week (as far as I can tell). ShiVa3D is a 3d development platform taylored towards anyone wanting to create 3D real-time applications and games for Web, Windows, Mac OS, Linux, iPhone, Android, Palm, Wii and the iPad. ShiVa is a powerful multiplatform 3D game engine, WYSIWYG 3D Editor and MMO Server.

It is probably the closest competitor to Unity3d which also offers a single editor/GUI for creating games and 3d applications for multiple platforms including the Web.

For the indie user, however, ShiVa's main advantage over Unity is that it enables you to develop for all aforementioned platforms for at a very reasonable price. Unity still charges individual prices for each platform.


In regards to using Softimage with it: Shiva imports DAE files but animated files exported directly from Softimage can be problematic. Shiva's importer purges duplicate keyframes and Softimage's export has no straight way of tweaking data (randomising keyframes) so that third party apps do don't do this.

I discovered this when I did some tests here:
http://www.stonetrip.com/developer/forum/viewtopic.php?f=12&t=20690

Export options for Collada 5.1:


Several apps can process Softimage-exported DAE files correctly. Ultimate Unwrap 3d is one of them.

20 August 2010

MATERIALS Tutorials by Philip Klevestav

Posted up on Game Artists recently is a fantastic set of tutorials on how to create specific materials for Game art.
http://www.philipk.net/tutorials/materials/materials.html

METAL

As with all materials, there are a lot of different types of metal. In this tutorial I go through howto create a pretty standard matte metal wall with a sci-fi touch and I tried to make it something inbetween clean and worn.


ROUGH AND COARSE STONE

Stone cliffs and rocks usually have a lot of direction of some type in them. In this tutorial I go through how I go about sculpting such a material in Zbrush and the process from there.

This tutorial will guide you through the creation of a rough stone surface, this could be combined with something more similar to the cliff wall tutorial above to create various types of rock surfaces.

Cracked stones can look very different depending on what materials is underneath the surface, what type of damage has been done and how long ago the damage was made. Here I go through some steps to create a broken up ground piece. Ingame something like this could be masked out and used as a decal as well.


SMOOTH AND SEMI SMOOTH STONE

Marble can be another tricky surface to create. Here I created a clean polished marble surface that is highly reflective. It is all about subtle details on these kind of clean materials, especially when it comes to the normal map.

Clean concrete blocks are usually pretty smooth, but there are details and small subtle variations is such surfaces that you can really play around with. In this tutorial I go through some steps you can do using Photoshop only.


BRICKS AND BLOCKS

Older or larger tiles may benefit from being sculpted in a program like Zbrush first. Here I go through some steps to sculpt such pieces and how much you can build with just a couple of sculpted stones if placed right.

Sometimes it is not really necessary to sculpt your stones. Especially when it comes to smaller brick walls. In this tutorial I go through some steps to give your brick wall more depth than a simple photo texture would work if generated into a normal map.


EDIT: Previous tutorials by PhilipK, excellent stuff!:


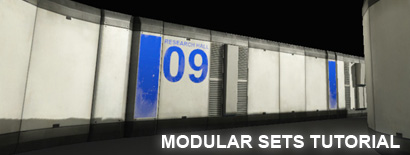
PHILIPK.NET - WORKING WITH MODULAR SETS


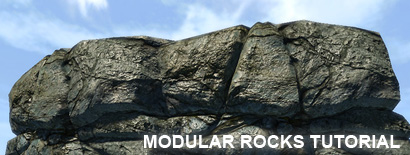
PHILIPK.NET - WORKING WITH MODULAR ROCKS